World of CraftWar Crypt
Hi guys! Welcome to the world of the undead! This tutorial is for a crypt for a Pathfinder game, and I'm here to show you how I went about it. It's way easier than it looks, promise. I made this as an entry into the July World of CraftWar competition on the DMsCraft Forums. You can check the forums out here. Anyways, the theme of July was graveyards/crypts, and since my current game could very likely send my players into a crypt I decided to go with that. This is a large tile that I am able to use with the modular dungeon tiles I've already made. So lets get started!
Materials:
Cardboard (single or double thickness, depending on your preference)
Hot glue
Plastic skeletons
Small wooden dollhouse pieces
Small wooden 'boys'
Cotton balls
Large popsicle stick
So first get your base. I choose a piece of cardboard about 12.5" x 14". I got this size from cutting apart a regular sized box at the folds, and this was one of the inside pieces. All of my other modular dungeon tiles are made from double corrugated cardboard, so when I put this one next to one of those, it will be a step down for the players, however I thought that actually added a nice touch, like stepping down into an crypt room, in my mind I see it as that extra little bit of suspense or strategy possibility.

So next, take a different piece of cardboard and cut out some rectangles. You will need 2 pieces that are 3"x2", two pieces that are 2"x1" and two pieces that are 3"x1".


Next we are going to put them together to form a little box. Grab one of the 3x2 inch pieces and then on each side, glue down the 2x1 inch pieces. Then, take the other 3x2 inch piece and glue it on top to make an open box.


Then take the 3x1 inch pieces and glue them on each side to close everything up.


To make the back of the altar, cut out another piece of cardboard 3" x 4". Glue it to one side of the box.


To make the altar even more ominous, we are going to add a super giant skull to it. I got this skull in a pack of 50 pieces of skeleton table sprinkles. The package comes with skulls, rib cages, and hands. I found them on amazon for about $6 for the entire package. I took one of the skulls and glued it onto the back of the altar towards the top and in the center. I spread some extra hot glue around the edges of the skull so that it looks like it is actually part of the wall.


To finish up the altar you need to add some potion/curse making materials. I had these wooden pieces sitting around my craft room, however all these pieces are very easy to find at an craft store. I used some various sized wooden bowls and a couple of wooden pitchers. I glued them down on top of the altar in a way that sort of looked ritualistic, i suppose...

|

|
I still wasn't happy with the altar, it needed something a little extra. I wanted to add some torches either around the altar or on it. I also had some of these small wooden pots laying around, and a large square dowel left over from making my gridless measurement sticks. So I measured the sticks to fit on either side of the back of the altar and then glued the pots to the top of each of the sticks.


The next thing I wanted to do was make the crypt gravestones. I wanted to make a crypt with graves under the floor, and the gravestones looking more like a simple plaque marking the graves. So I took another piece of cardboard, and cut it into 1" x 1" squares. I used a craft knife to cut out the strips and then my scissors to cut out the squares so that the craft knife would totally destroy their shape. Then put those aside for a moment and we can start planning the full layout of the tile.


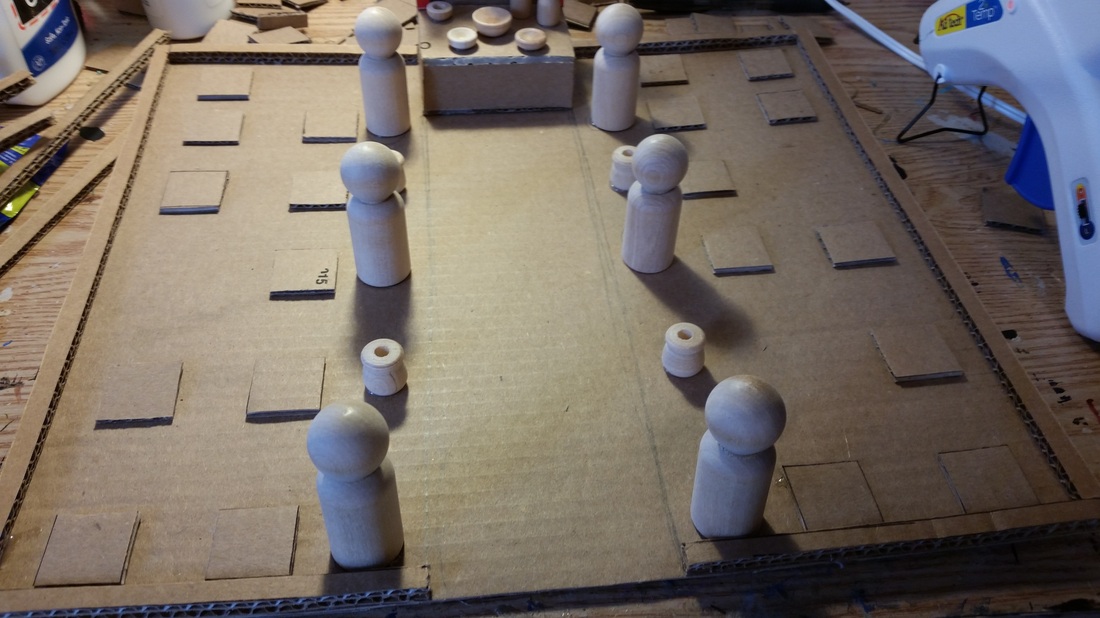
So here we have two more different types of wooden pieces I will be using. The first are these tall pieces that I think are supposed to vaguely resemble a person. I'm going to use them for decorative pillars though, because I'm a rebel and I don't follow the rules. Next I have another pot, just a slightly different variation. These just have a small hole at the top, so they are more like a vase I suppose. Here is how I planned out the tile. Then I went ahead and put the walls around the edges, and glued down the pillars and the vases.


Now it's time to glue down the gravestone tiles. Notice in the picture below that there were a few spots where a tile is not placed, there is a reason. It is such an awesome reason, and you are going to find out really soon what that reason is. Well, OK, so the finished picture is at the top, you've probably figured it out. Doesn't make it less awesome.
Now comes the really fun part. You get to rise undead skeletons from their graves. Muahahaha. The skeletons I used came in a pack of 50, I got these off of Ebay in bulk, but you can also find these particular skeletons on Amazon as well. They are 2 inch figures, so they can only be used for a skeleton of a large creature, but they are cheap and they have weapons and they are pretty awesome. So I started cutting up skeletons for their body parts.


So now its time to start gluing them to the tile. The one I have there that is just the arm with the hatchet I used one method, and the rest a different method. So first what I did was took one of the 1x1 inch squares and traced out with a pencil where they should be on the base. Then I took a grave marker and cut it up so it looked broken. I glued it down so that it looked like it had been broken from the middle and from underneath. I glued the pieces so that they weren't flat on the base but sticking up a bit, and there was a space in the middle where I then glued the skeleton arm with the ax. I added a bit of hot glue on the top of the tiles like chunks of dirt being thrown around.


So for the other three skeletons I glued the skeleton pieces down first and then cut up the tile and put the broken pieces around the skeletons. I glued the broken pieces on to again make it look like the skeleton is pushing itself up from under the floor and like the tile is broken because of it. I also decided that it was really silly for skeletons to be basically out and to not have any other tiles that are broken like something is about to come up. So I took my craft knife and sliced up some of the tiles I already glued down, and used the knife to sort of pry up some edges to make them look broken. You can see that in the last picture below.


Next we move onto the painting and details! I base coated it black and then used this method to paint the floor, pillars, and altar.


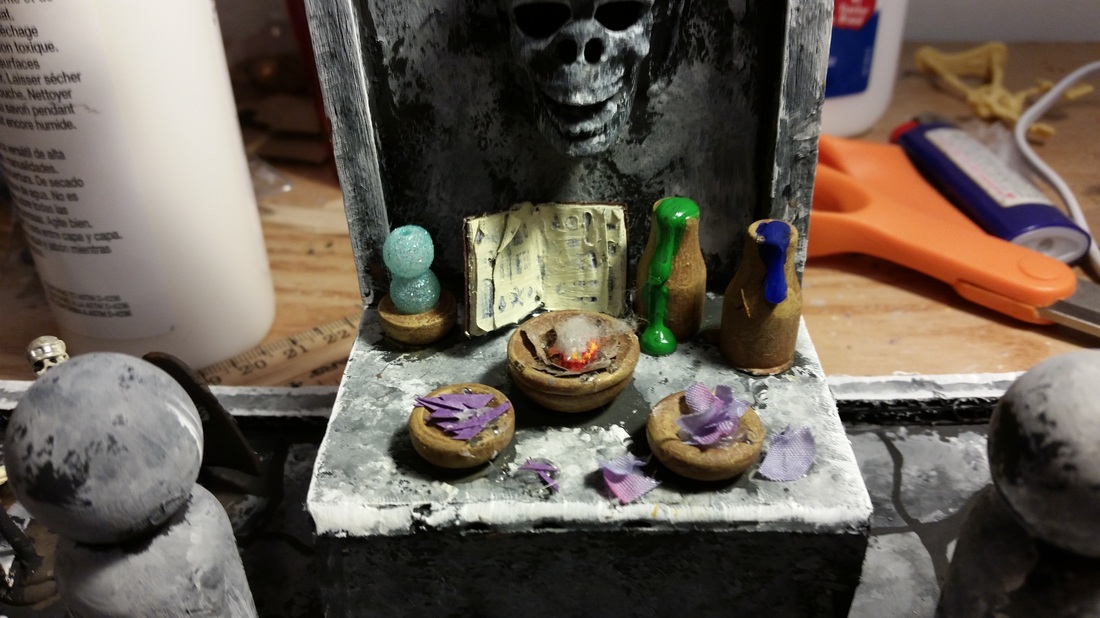
Next on to the details of the altar. I took a cotton swab and ripped off some pieces and glued them into the pots I glued to the top of the altar. I painted those cotton pieces with red and yellow paint to look like fire, and then left a little bit at the top white to look like smoke.


Then I took a silk flower and cut the petals up into small pieces, and then took a piece of colored cardstock and cut that up into tiny pieces as well. I then glued those pieces into the front two smaller bowls. I also glued a few on the altar surface like they had fell out of the bowl, because I liked the look of it. Since the skeletons are in the process of rising out of their graves, I wanted to make it look like the ritual had just been performed. So in the big bowl in the middle I wanted to put some ashy substance and a little bit of smoke. So I took a lighter and a piece of paper and burned about half the paper and then collected the burned bits and carefully glued them into the bowl. Then I took a tiny tiny piece of the cotton ball and glued that on top. I then took a tiny bit of red and yellow and added it at the base of the cotton just to tie everything into each other.


As for the bottles and took my hot glue gun and made some drips down the sides of the bottles, then painted them bright blue and bright green. I wasn't sure what to put in the bowl in the back, and I decided on putting a cool looking bead in it to look like some sort of magical object. I found these packs of beads at Wal-Mart for $2 a piece, in lots of different colors. I decided on a sparkly blue ball and then the bead I pulled out happened to be still attached to another bead. So I went with it and glued it in the bowl.


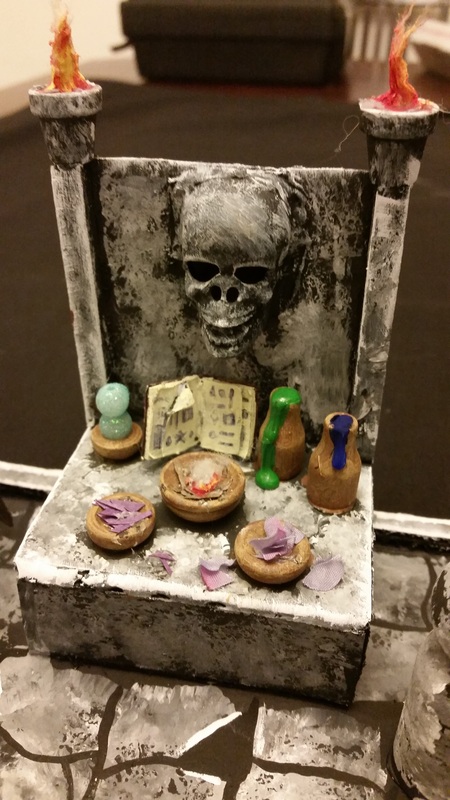
I STILL felt like something was missing. DUH. A SPELLBOOK. HOW THE HECK ARE YOU SUPPOSED TO DO A SPELL WITHOUT A SPELLBOOK. Jeez, Samy, pull it together. So I took a jumbo popsicle stick and put together a book based on the method here. To make it look like something was actually written on the book, after I got a couple coats on the pages I used a black ballpoint pen (for accuracy) and just drew some random symbols and lines. Then I went over the pages with the off whitish paint again to make the symbols look a bit faded. Then I glued the book down to the altar. TA-DA. A ritualistic altar!


So then for the final few finishing touches. In the small pots between the pillars I used the cotton ball method again to make flames coming out of the small holes on top. I painted the miniature skeletons and offish white and used a metallic silver paint and a blackish brown for the skeletons weapons. Then I took some black and brown and did a sort of dry brush stabbing method to dirty up the skeletons. I decided that the grave markers needed something on them, so I took another one of the pots I used for the flames on the altar and dipped the top in some black paint and stamped them on top of the squares. Then I took a small paintbrush and some red paint and put a red circle in the middle. I don't really know why, it just felt right. I also used a paintbrush to get the circle on the broken tiles as best I could.


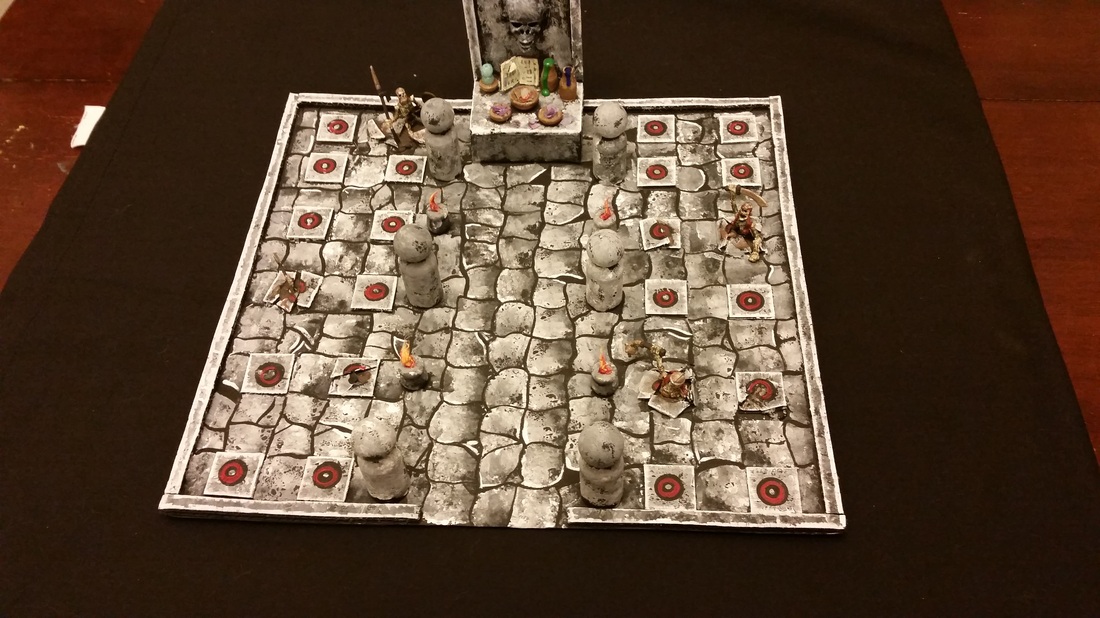
Waaa-lahh!!! The finished tile. I added a few minis on there so you can see the scale. Everything in the room is actually very large compared to the medium sized minis. This is all on purpose, because this is a crypt for giant warrior humans. Well, that's my use at least, they could be giant anything else as well. Whatever you want.


Please contact me with any questions, comments or concerns! Also please don't forget to follow me on Facebook, Twitter, and Tumblr!